Why Monitor IoT Devices at Home?
LogRhythm’s NetMon Freemium is a powerful and easy-to-use product, so why not fully realize its potential both at home and in the office?
In-home Internet of Things (IoT) devices, such as sensors, lights, cameras, and so forth, have seen a steady rise in usage. However, with this rise comes an increase in cyberattacks targeting these devices, such as the Mirai Botnet Ransomware.
It is now extremely pertinent to be vigilant about the embedded systems used throughout your home. With NetMon Freemium, you can download and run this software on a micro-PC. This means you can fully monitor your home network IoT devices quickly and easily, for little to no cost.
After following the instructions in this blog, you’ll gain visibility into data going in and out of your network, LAN traffic, and the roles of each host.
In order to capture this information and act on it, you’ll need to
- Configure port mirroring on your router
- Profile IoT devices for security monitoring
- Understand your network vulnerability
- Be able to access your NetMon deployment remotely
So, how do you actually complete these steps?
Download NetMon Freemium.
Configuring Port Mirroring on the Router
First, ensure that you have the ability to configure the firewall on your router. For this demo, I used IPTables, so I’d recommend flashing the router with DDWRT or Tomato, if you aren’t able to do the following steps on your router’s stock firmware.
First, ensure that your NetMon server is up, running, and physically connected to the router via the two LAN cables—management and sniffing interfaces.
Then, determine the IP address that is assigned to the NetMon server. Make sure this is set to the bonded interface. Next, secure socket shell (SSH) into the router and run the below commands.
You can also create bash scripts that will configure IPTables to mirror all LAN and WAN traffic to the defined NetMon IP address.
# Save existing IPTables configuration to the temp directory
iptables-save > /tmp/old.fw

# Configure IPTables to mirror traffic to the NetMon server
iptables -I PREROUTING -t mangle -j ROUTE --gw <NetMon IP> --tee
iptables -I POSTROUTING -t mangle -j ROUTE --gw <NetMon IP> --tee

# Save the new IPTables configuration to the temp directory
iptables-save > /tmp/new.fw

# Ensure that the rules were successfully updated
cat /tmp/new.fw | grep -i mangle -A 15
Figure 1: Running a Command to Configure Port Mirroring
# Remove the ‘mangle’ rules (be mindful of any default mangle rules!)
iptables -F -t mangle
Figure 2: Running a Command to Restore Default Settings or Remove Port Mirroring
Many routers have read-only file systems. However, there is usually a writeable directory on them so that you can store scripts and other files.
Thus, determine what the location is for your particular router. At this point, you could configure the script to execute during system startup, but I chose to keep this a manual process. I did this to retain better control over when traffic is mirrored and which devices it is mirrored to.
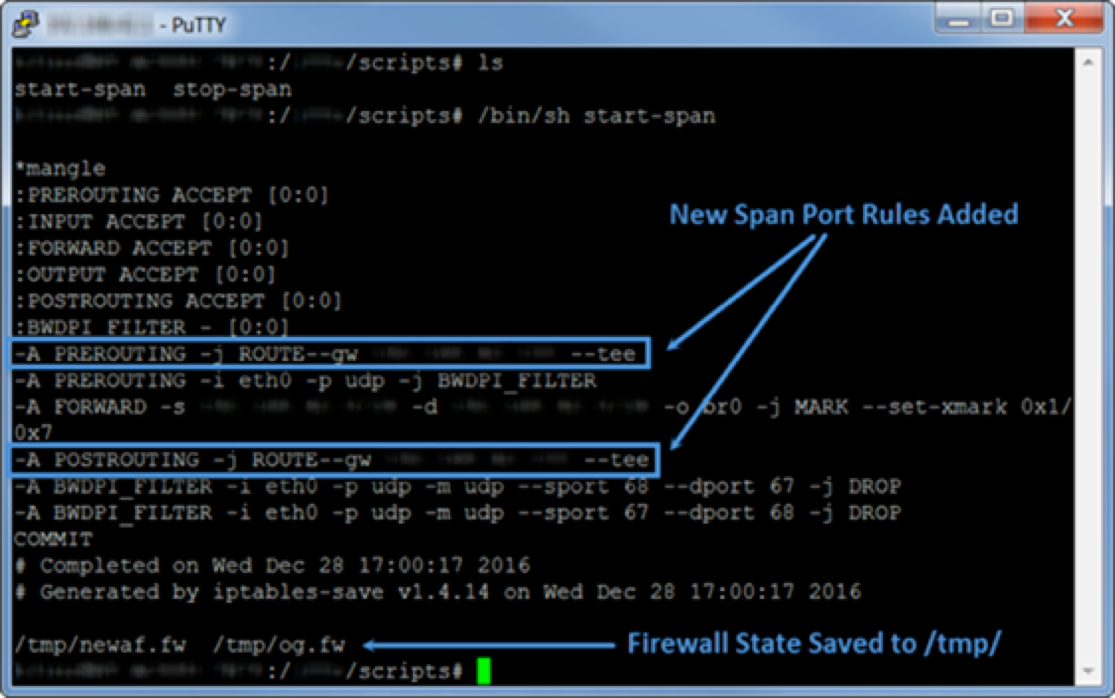
Figure 3: New Span Port Rules Added
Following the initial configuration, I was capturing traffic, and things seemed to be going great. However, as soon as content was streamed, my entire network began to slow down. This was due to the router attempting to keep up with mirroring the data at the same rate that it was being transferred over the wire.
Fortunately, the router has the capability to utilize Link Aggregation. So, I migrated both of the cables to LAN ports 1 and 2, and proceeded to restart both the NetMon Mini and the router to start fresh following the configuration change.
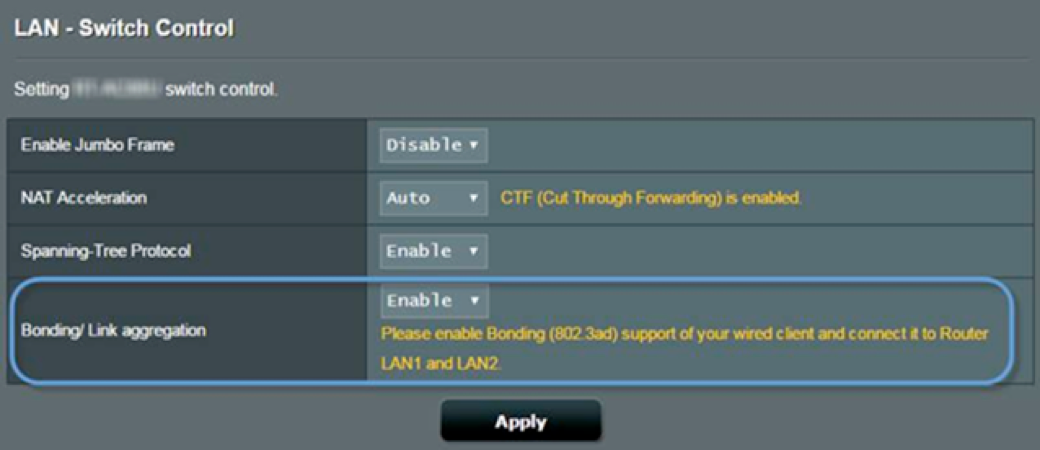
Figure 4: Cables are Migrated to LAN Ports 1 and 2
I was then able to mirror traffic to the NetMon Mini. There was no noticeable degradation on the router’s performance, or the network in general, after leaving this up and running for over a week.
Profiling Network and IoT Devices for Security Monitoring
Now that I can see all internal IPs, LAN, and WAN traffic, I can start to profile my internet-connected devices by IP and MAC addresses.
I can determine what rules can be created based on the activity observed. Fortunately, this is very easy to do, as IoT devices are meant to perform very specific functions and only really talk to a handful of internal and external services. The example below is traffic from an unnamed brand of lights.
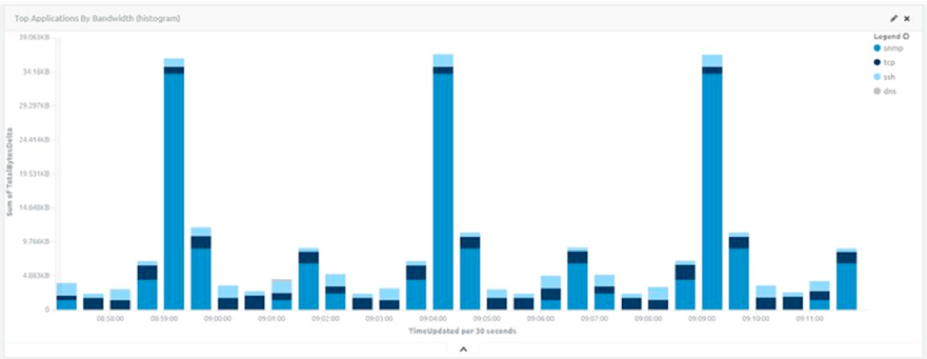
Figure 5: Traffic from an Unnamed Brand of Light
Seriously, it’s very easy to trend off of these devices. Just get a baseline of normal behavior and then perform actions on the devices of which you would like to be notified.
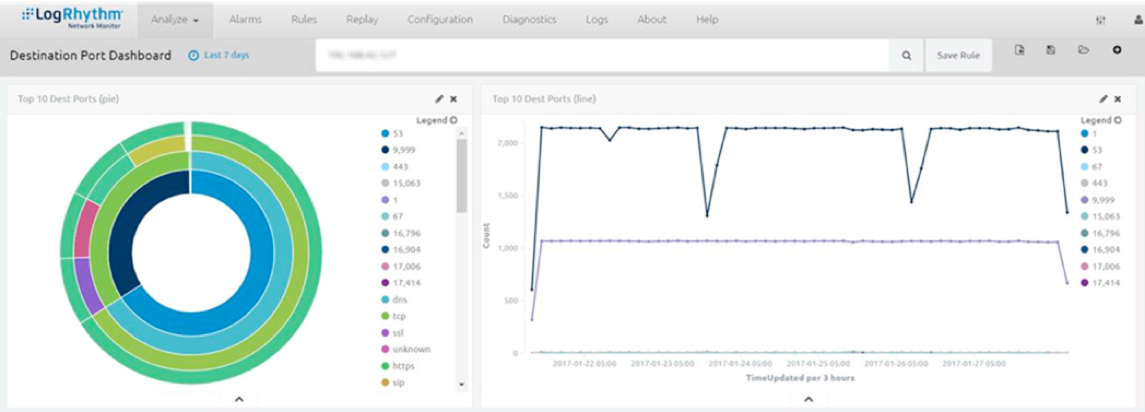
Figure 6: Trends Derived from Data Traffic Updated Every 3 Hours
By trending off of traffic, I can identify just about any behavior observed on the network, because a home network is much smaller and simpler than that of an enterprise.
I can receive an alert on almost anything—from someone poking around on my network to when your Amazon Alexa is asked a question.

Figure 7: Data and Alerts Received by Asking the Amazon Alexa a Question
Perhaps even more critical, I can receive an alert when the front door is unlocked.
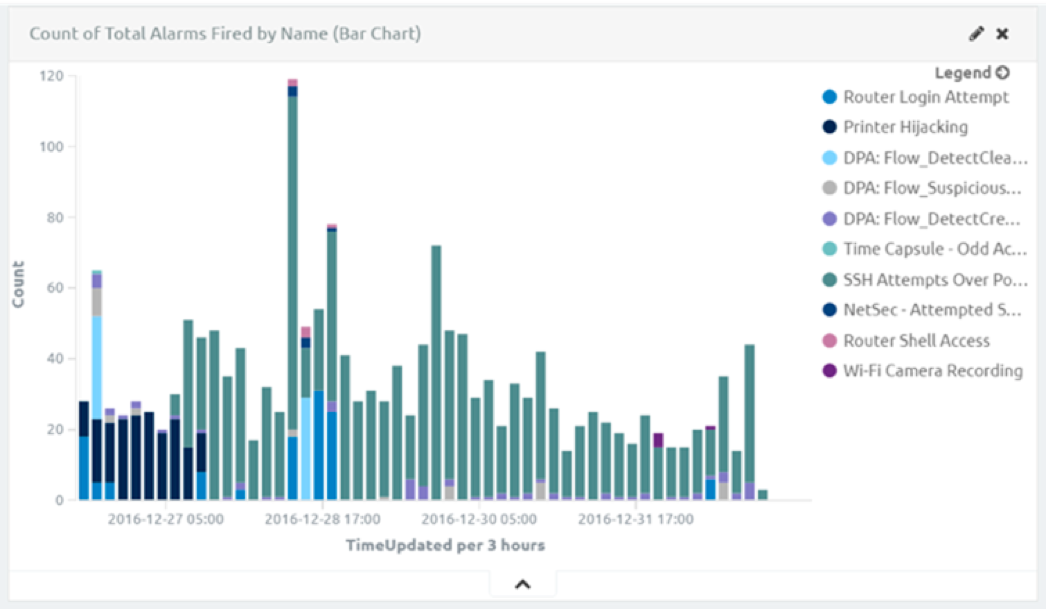
Figure 8: Count of Total Alarms Fired
Remote and Mobile Device Access
There are countless ways to access your home network remotely, but this is not something that I recommend most people try out. However, if you are going to do this, I’d recommend looking into a VPN service. There are plenty of great options out there, but I am going to discuss a different remote access option in this blog.
From time to time, I will set up a Linux server and use it to access my home network via SSH. However, it’s not something I leave up often, as I don’t like leaving an interface open to the internet. So, take the below information with a grain of salt.
There’s a great app called JuiceSSH that will not only act as a SSH client, but also allows for easy port forwarding so that you can view the NetMon web interface.
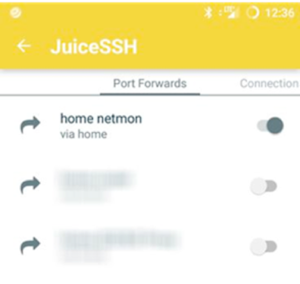
Figure 9: JuiceSSh Used to View the NetMon Web Interface
Once you have established a tunnel, you can check the status in the menu bar of the app.

Figure 10: Connecting to the NetMon Web Interface via JuiceSSh
Then connect!
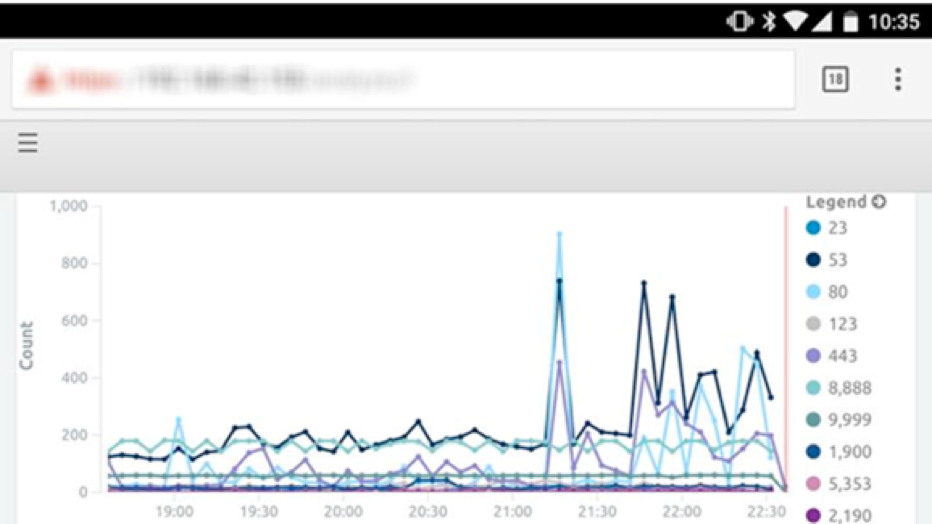
Figure 11: Your Home NetMon
Now, you’ll be able to log in and keep tabs on your home NetMon through your mobile device.
Research and Vulnerability Analysis
I know you’re going to be shocked to hear this but, IoT devices are not all that secure. Exactly! I can tell that you’re just as shocked as I was! But it’s true. IoT devices are basically Swiss cheese.
Still, to me, being able to walk into a room and have the lights turn on is cool enough to make it worth dealing with the risk.
In fact, if you are able to sniff out a session in which someone interacts with a light, you can obtain the client’s API key, and use this to access and control all lights connected to a single bridge.
In short, NetMon is not just a great tool for home network security, it’s also exceptionally useful for vulnerability research. You can see this most notably in mobile applications, as you don’t need to spend a lot of time setting up a proxy and configuring everything in your network to play nice with it.